This is an old revision of the document!

Voxibot
set up voxibot with right package :
To be able to connect chatbot with voxibot we need specific database package which we would like to implement and integrate. therefore the first step is to download the necessary data files from the source of voxibot platform. Our sources exist on GitHub Voxibot. These files are the backbone of our communication process between chatbot engine and voxibot.
Let's start
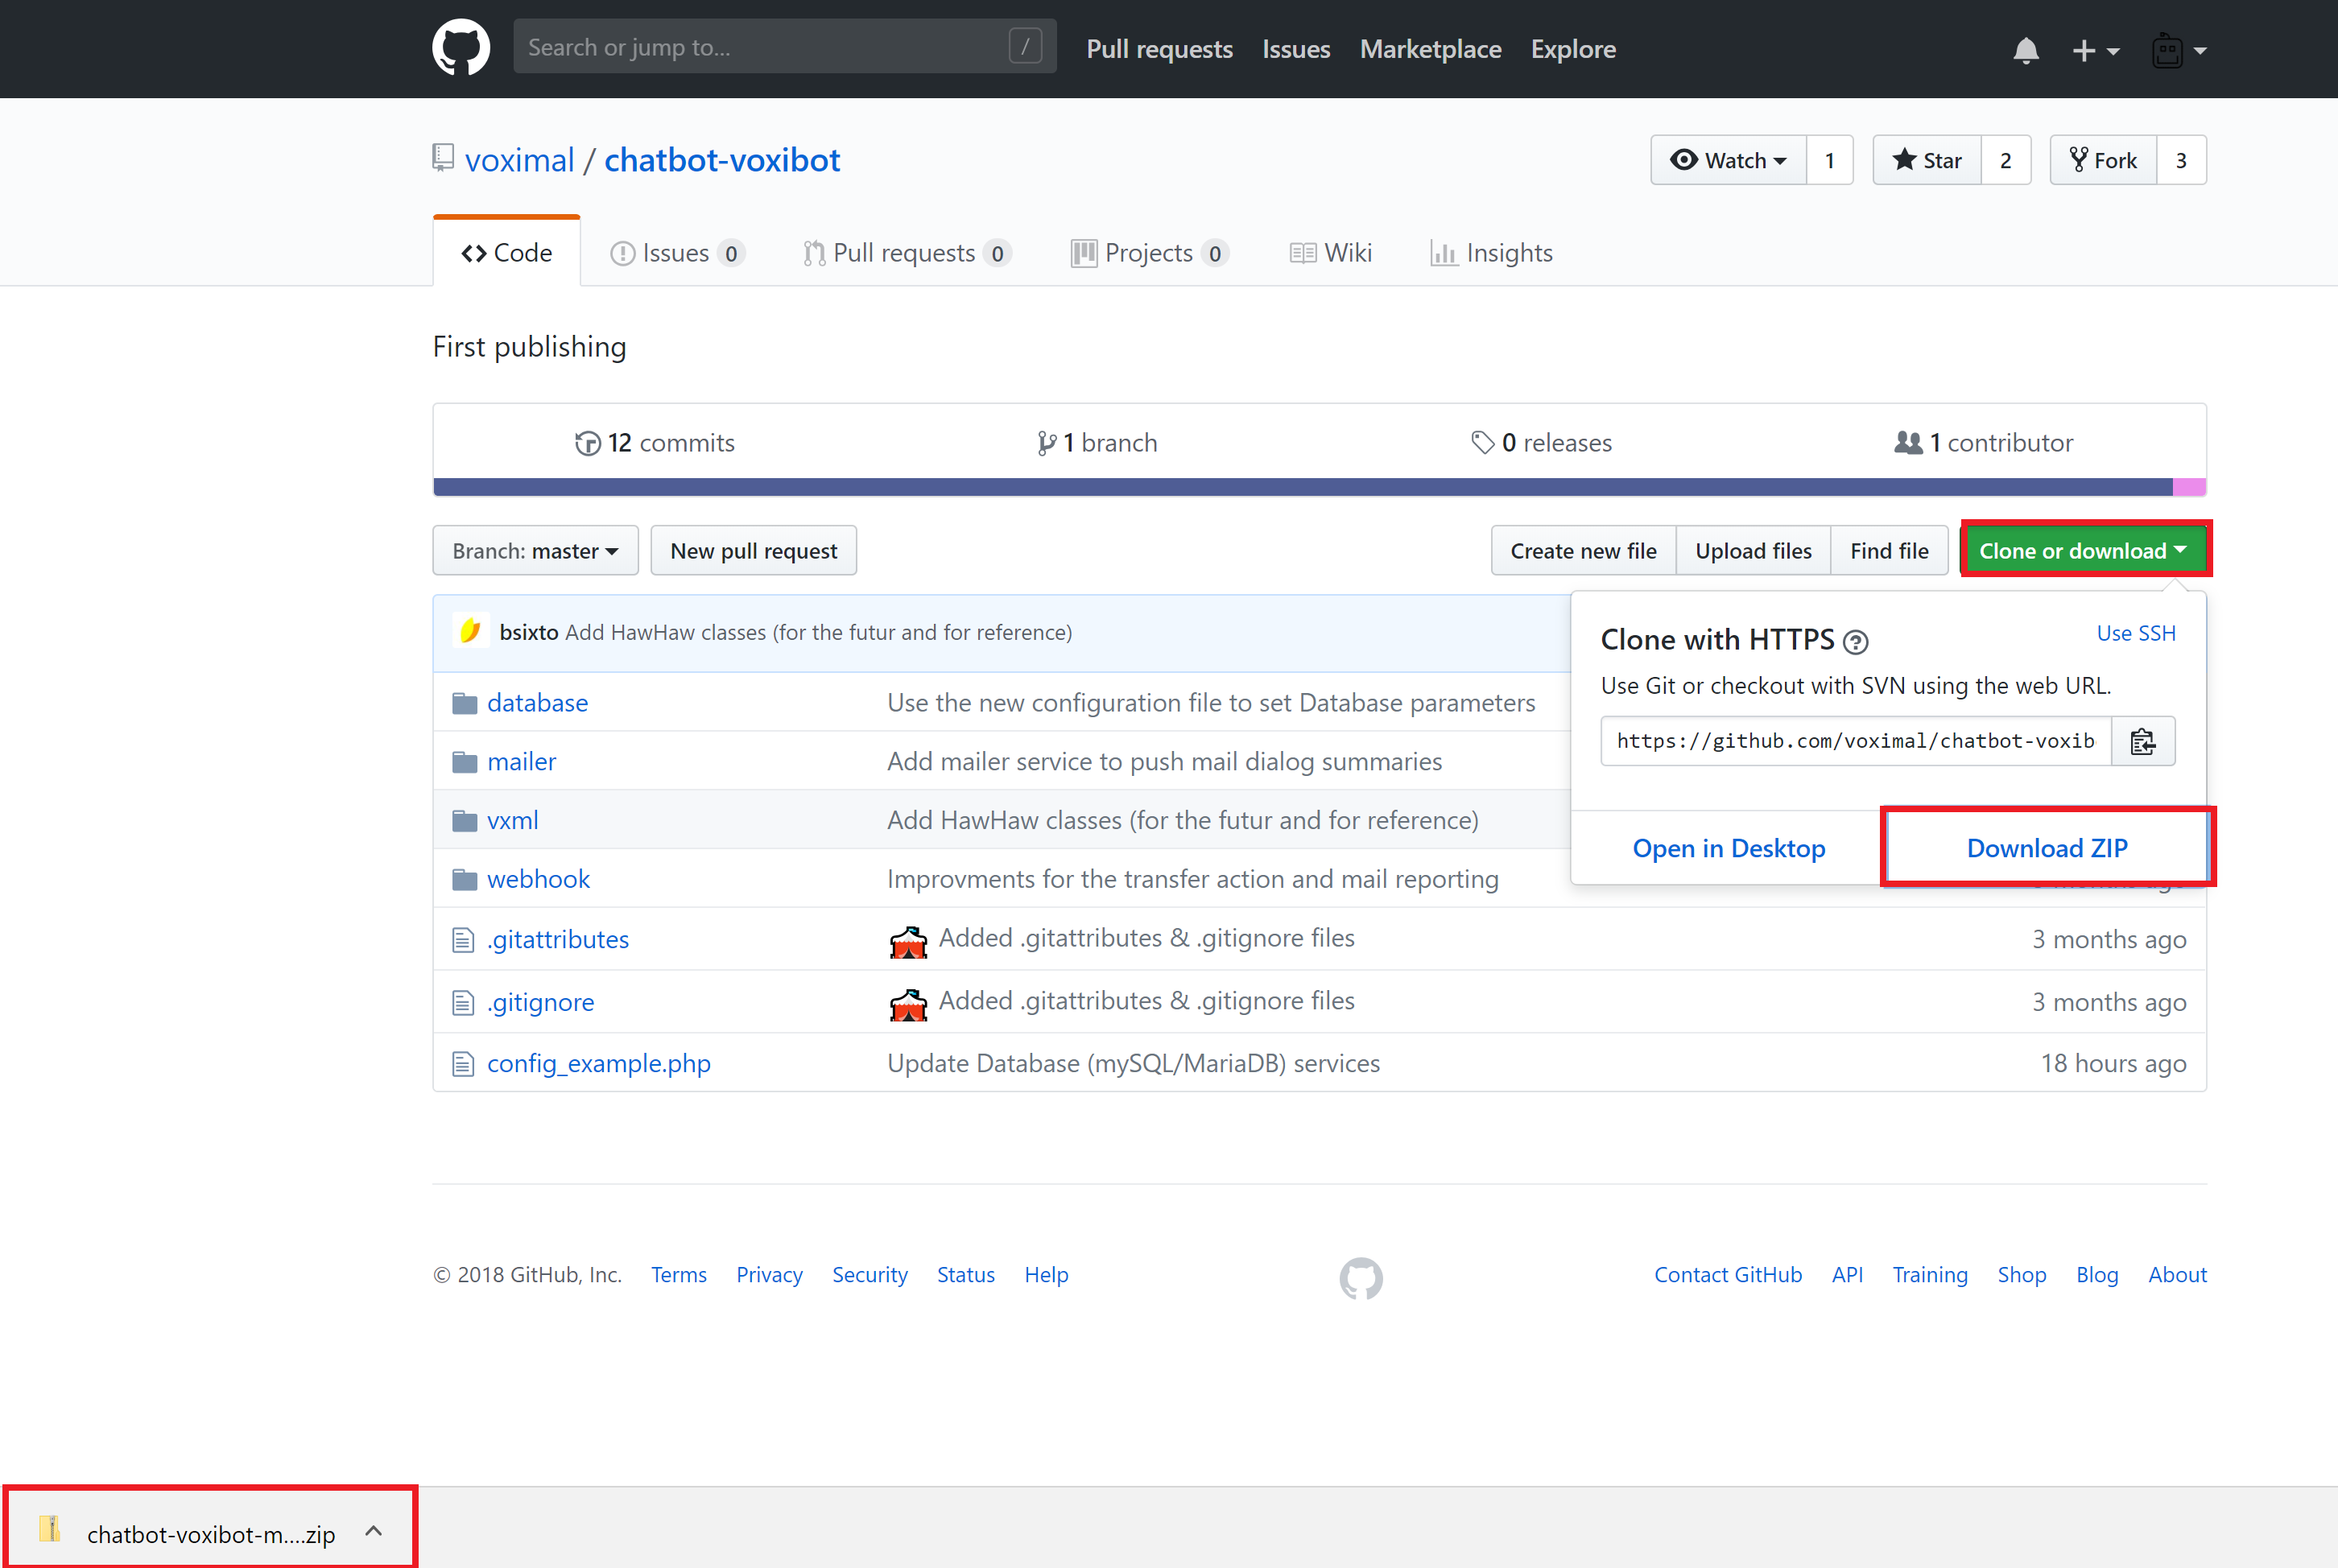
1. Go to the files and folders by this link Voxibot packages. Click clone or download then Download ZIP. when the download finishes you go to a directory of file place and Extract the file.
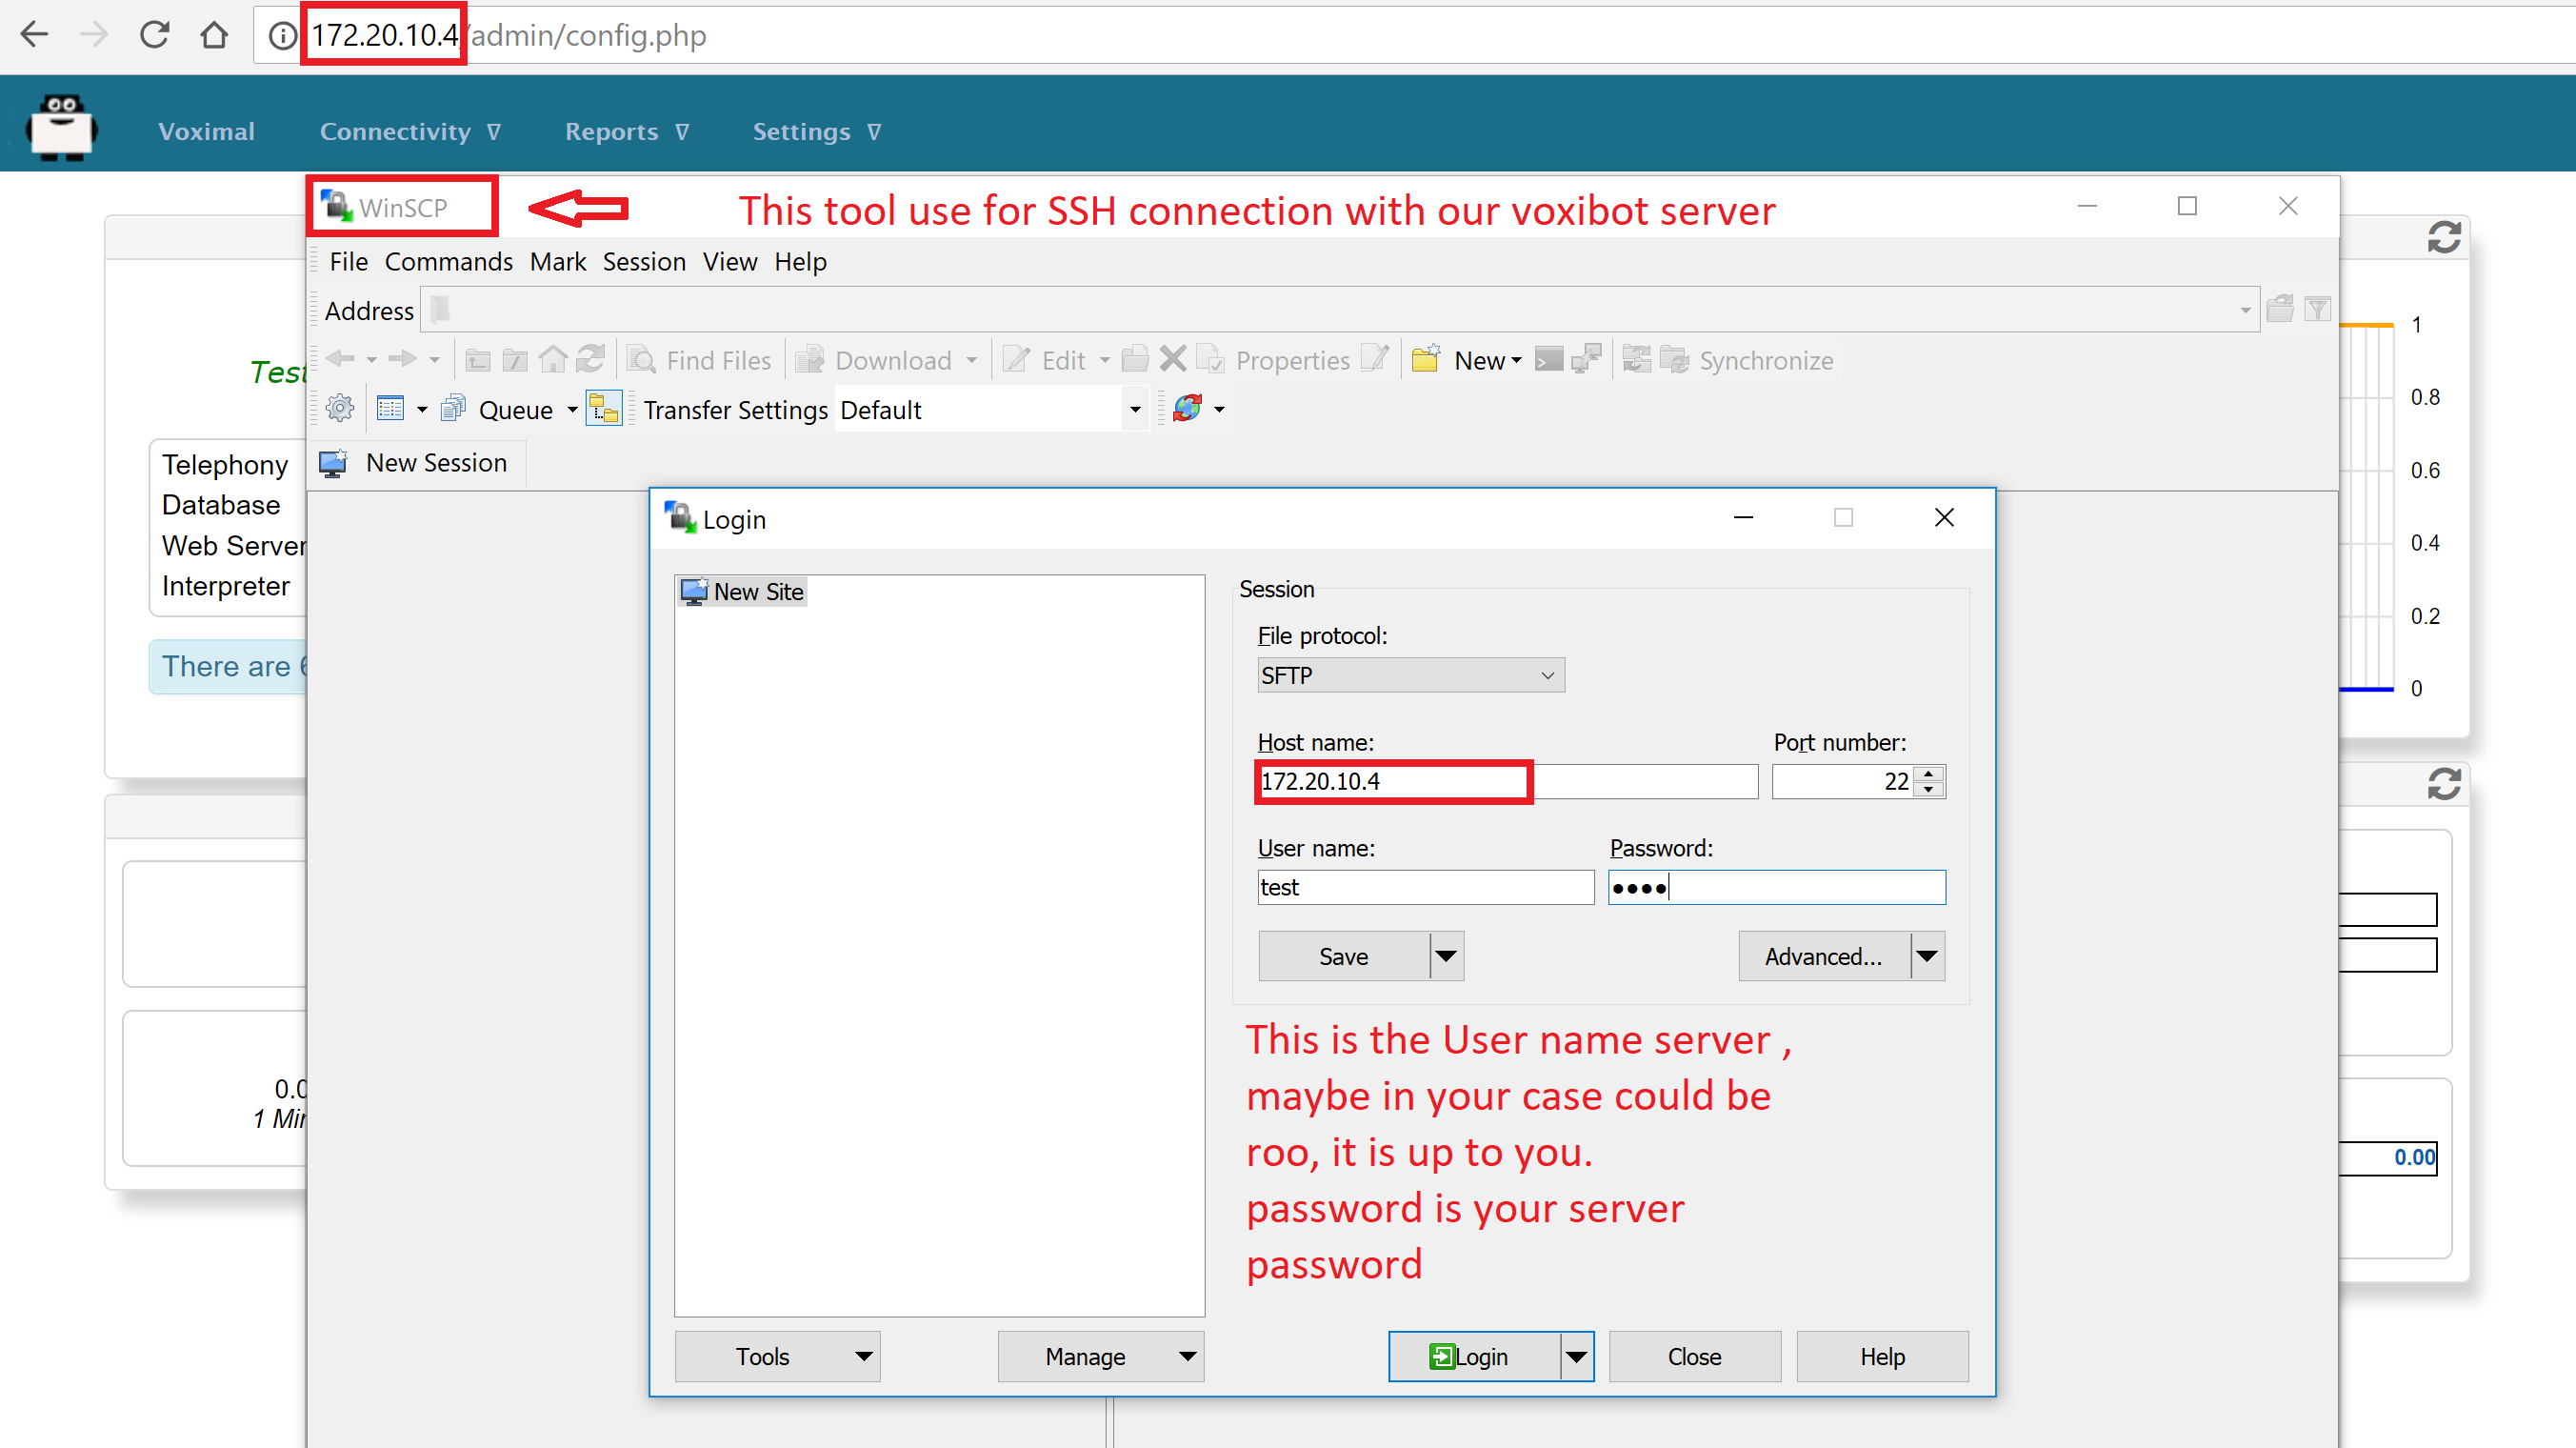
Remark :This step if your host machine is windows and you download the package on Windows. It is better to use SSH connection to insert the package on your voxibot server. In our case, we use a tool called WinSCP
2. Connect your SSh tool (WinSCP) to your voxibot server, put the host name: IP of your server, user name : root or [ your server name ] password : [ root password ] or [ user password ]
3. Go to the file that you download and copy it then Paste it on your voxibot server with correct directory /var/www/html/vxml

Go and browse the folder and verify all the files. So By finishing these steps, you can start your chatbot integration with various engines. all you need now some credentials and set it on root.vxml file and conversation file depend on the engine. For instant conversation_watson.vxml in case of watson engine and so on. You can find the Documentation regards to an engine that you want. click here Connecting with chatbot :
Now form voxibot side:
In this side we need to adapt our watson credential in easy way inside Voxibot, then by finishing these next steps we will be able to talk to our chatbot thanks to voximal voice assistant. Note, We deal with Arabic language as we will see.
Let's start step by step
Note : Each step you edit or add something new you should do save/submit the apply config
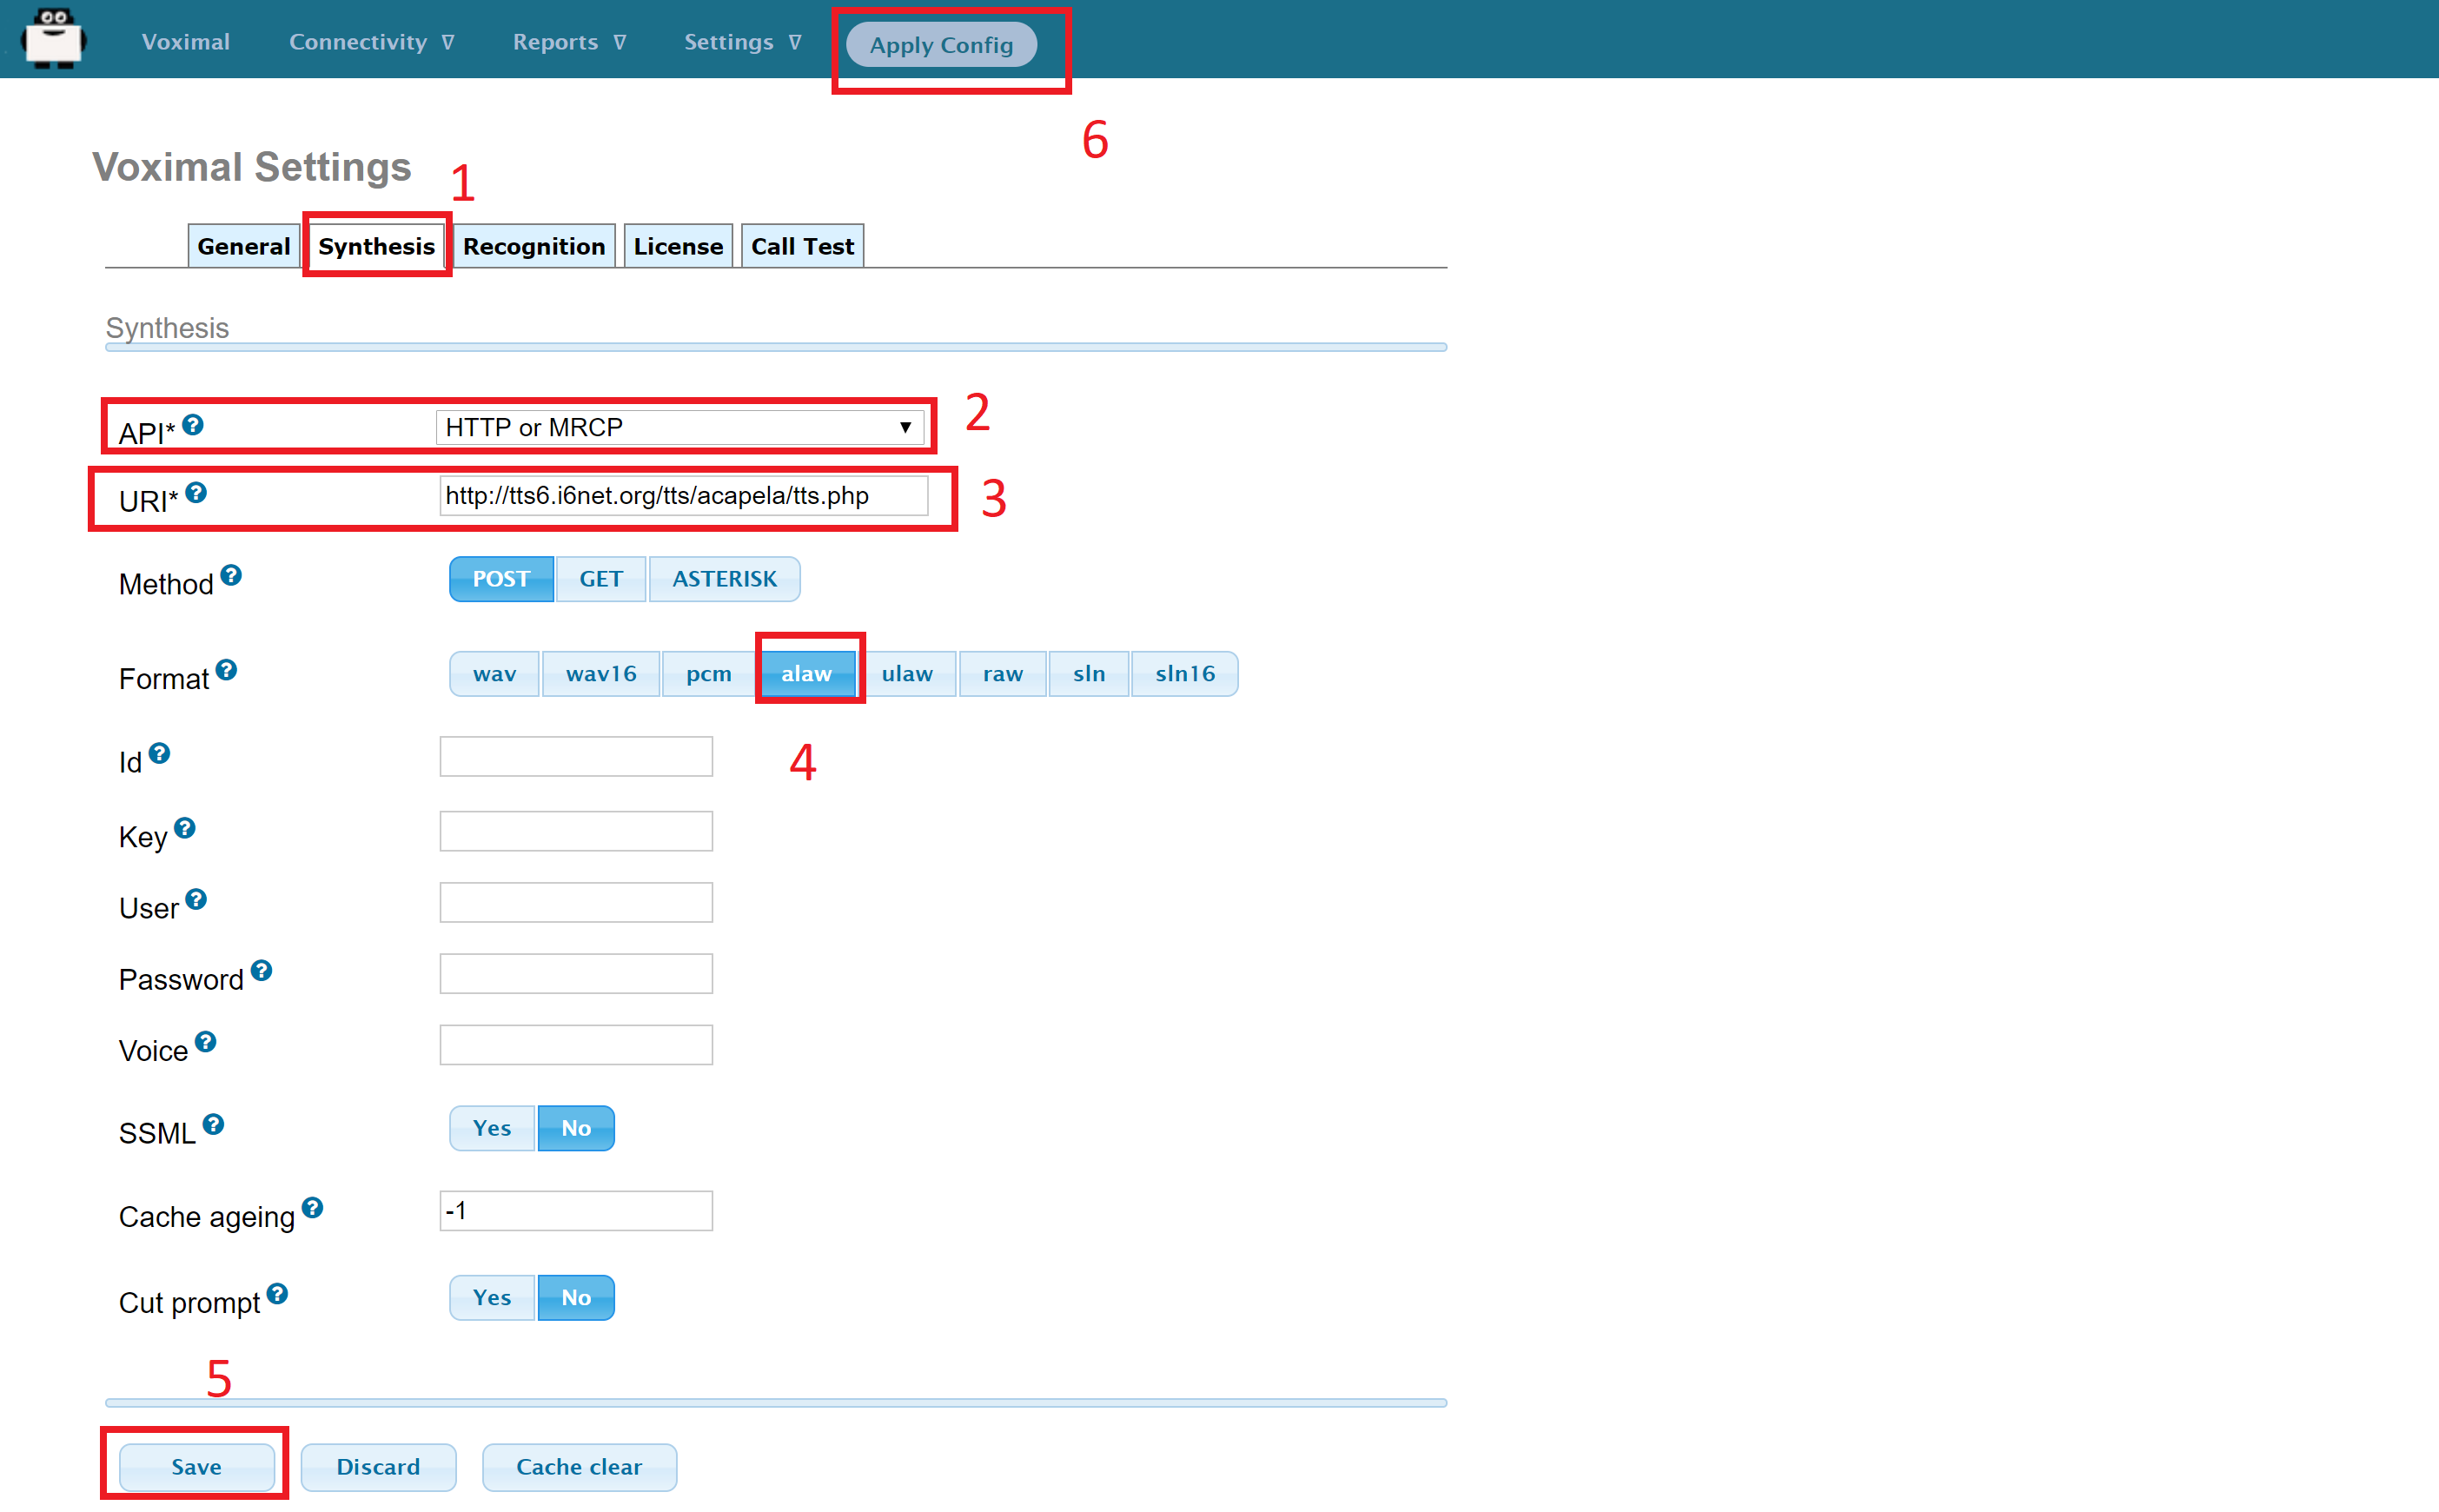
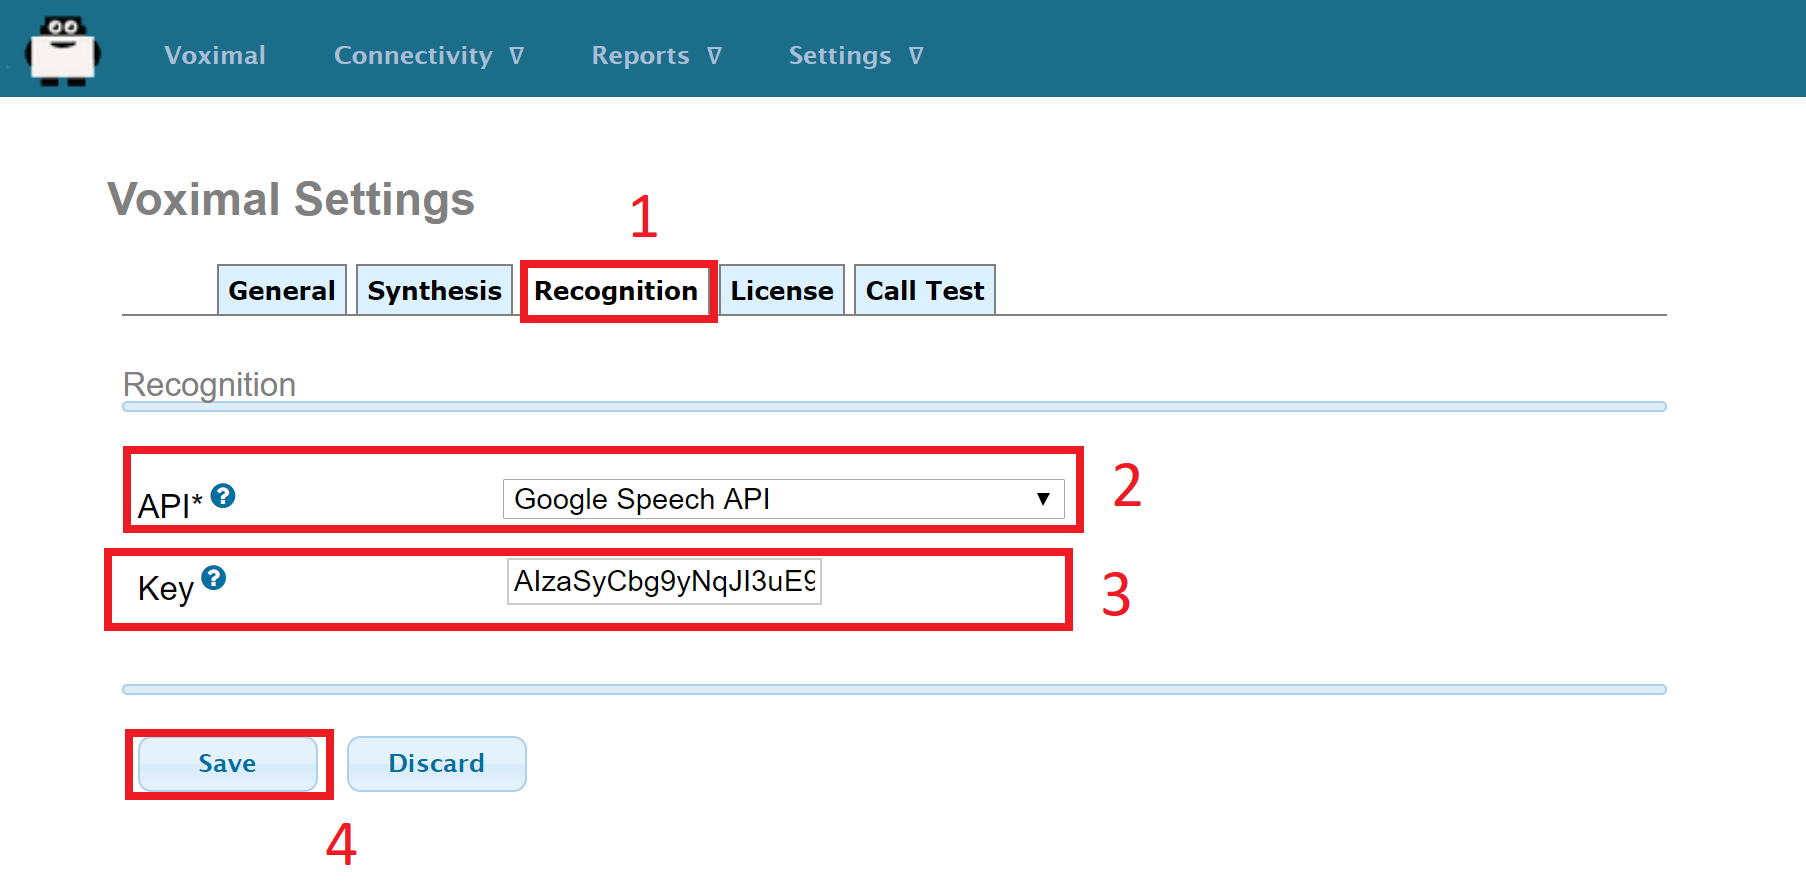
1. To start configuring our voxibot firstly, go to settings then voximal settings to adjust our settings.

2. As shown below choose your API, in our case HTTP or MRCP which easy and support Arabic. Just copy and paste the link in URI http://tts6.i6net.org/tts/acapela/tts.php. Pay attention to format (alaw), save and apply config after finishing.
3. We need API recognition engine to print out and translate our input as a text to be understood by the chatbot. You need to have a credential key for Google or your favorite provider. There are other engines can provide recognition features that depend on the quality and the language support.
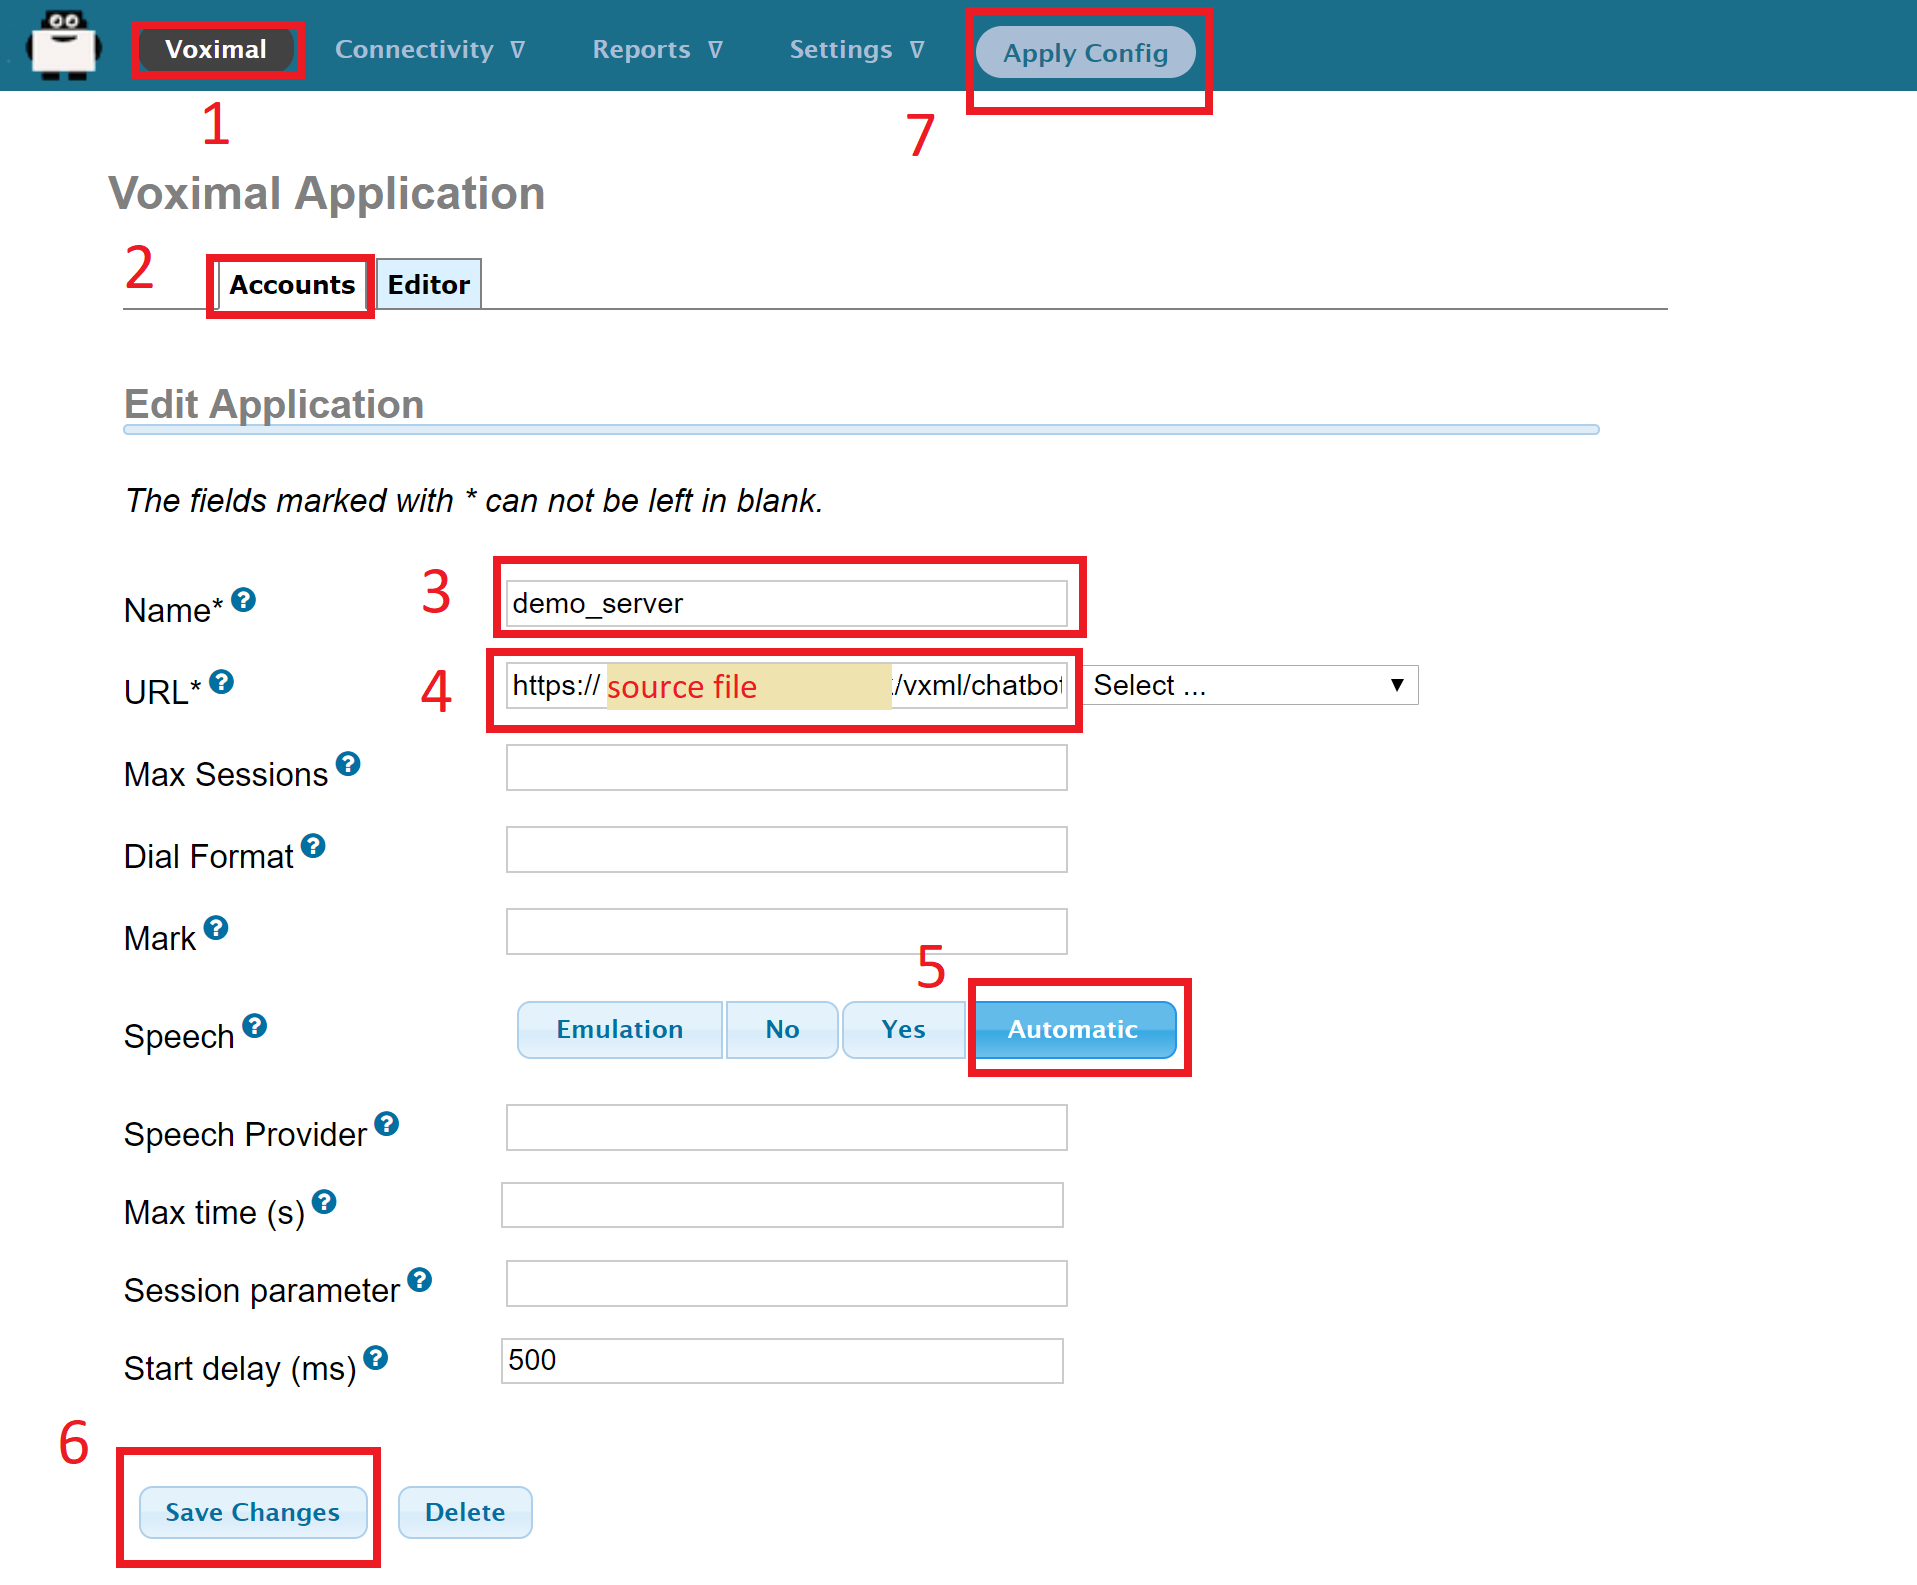
4. Create an account to assign it to a Number, this account will connect to the database to communicate with the chatbot, URL is the source where our essentials file located. set the speech to Automatic to avoid any issues,
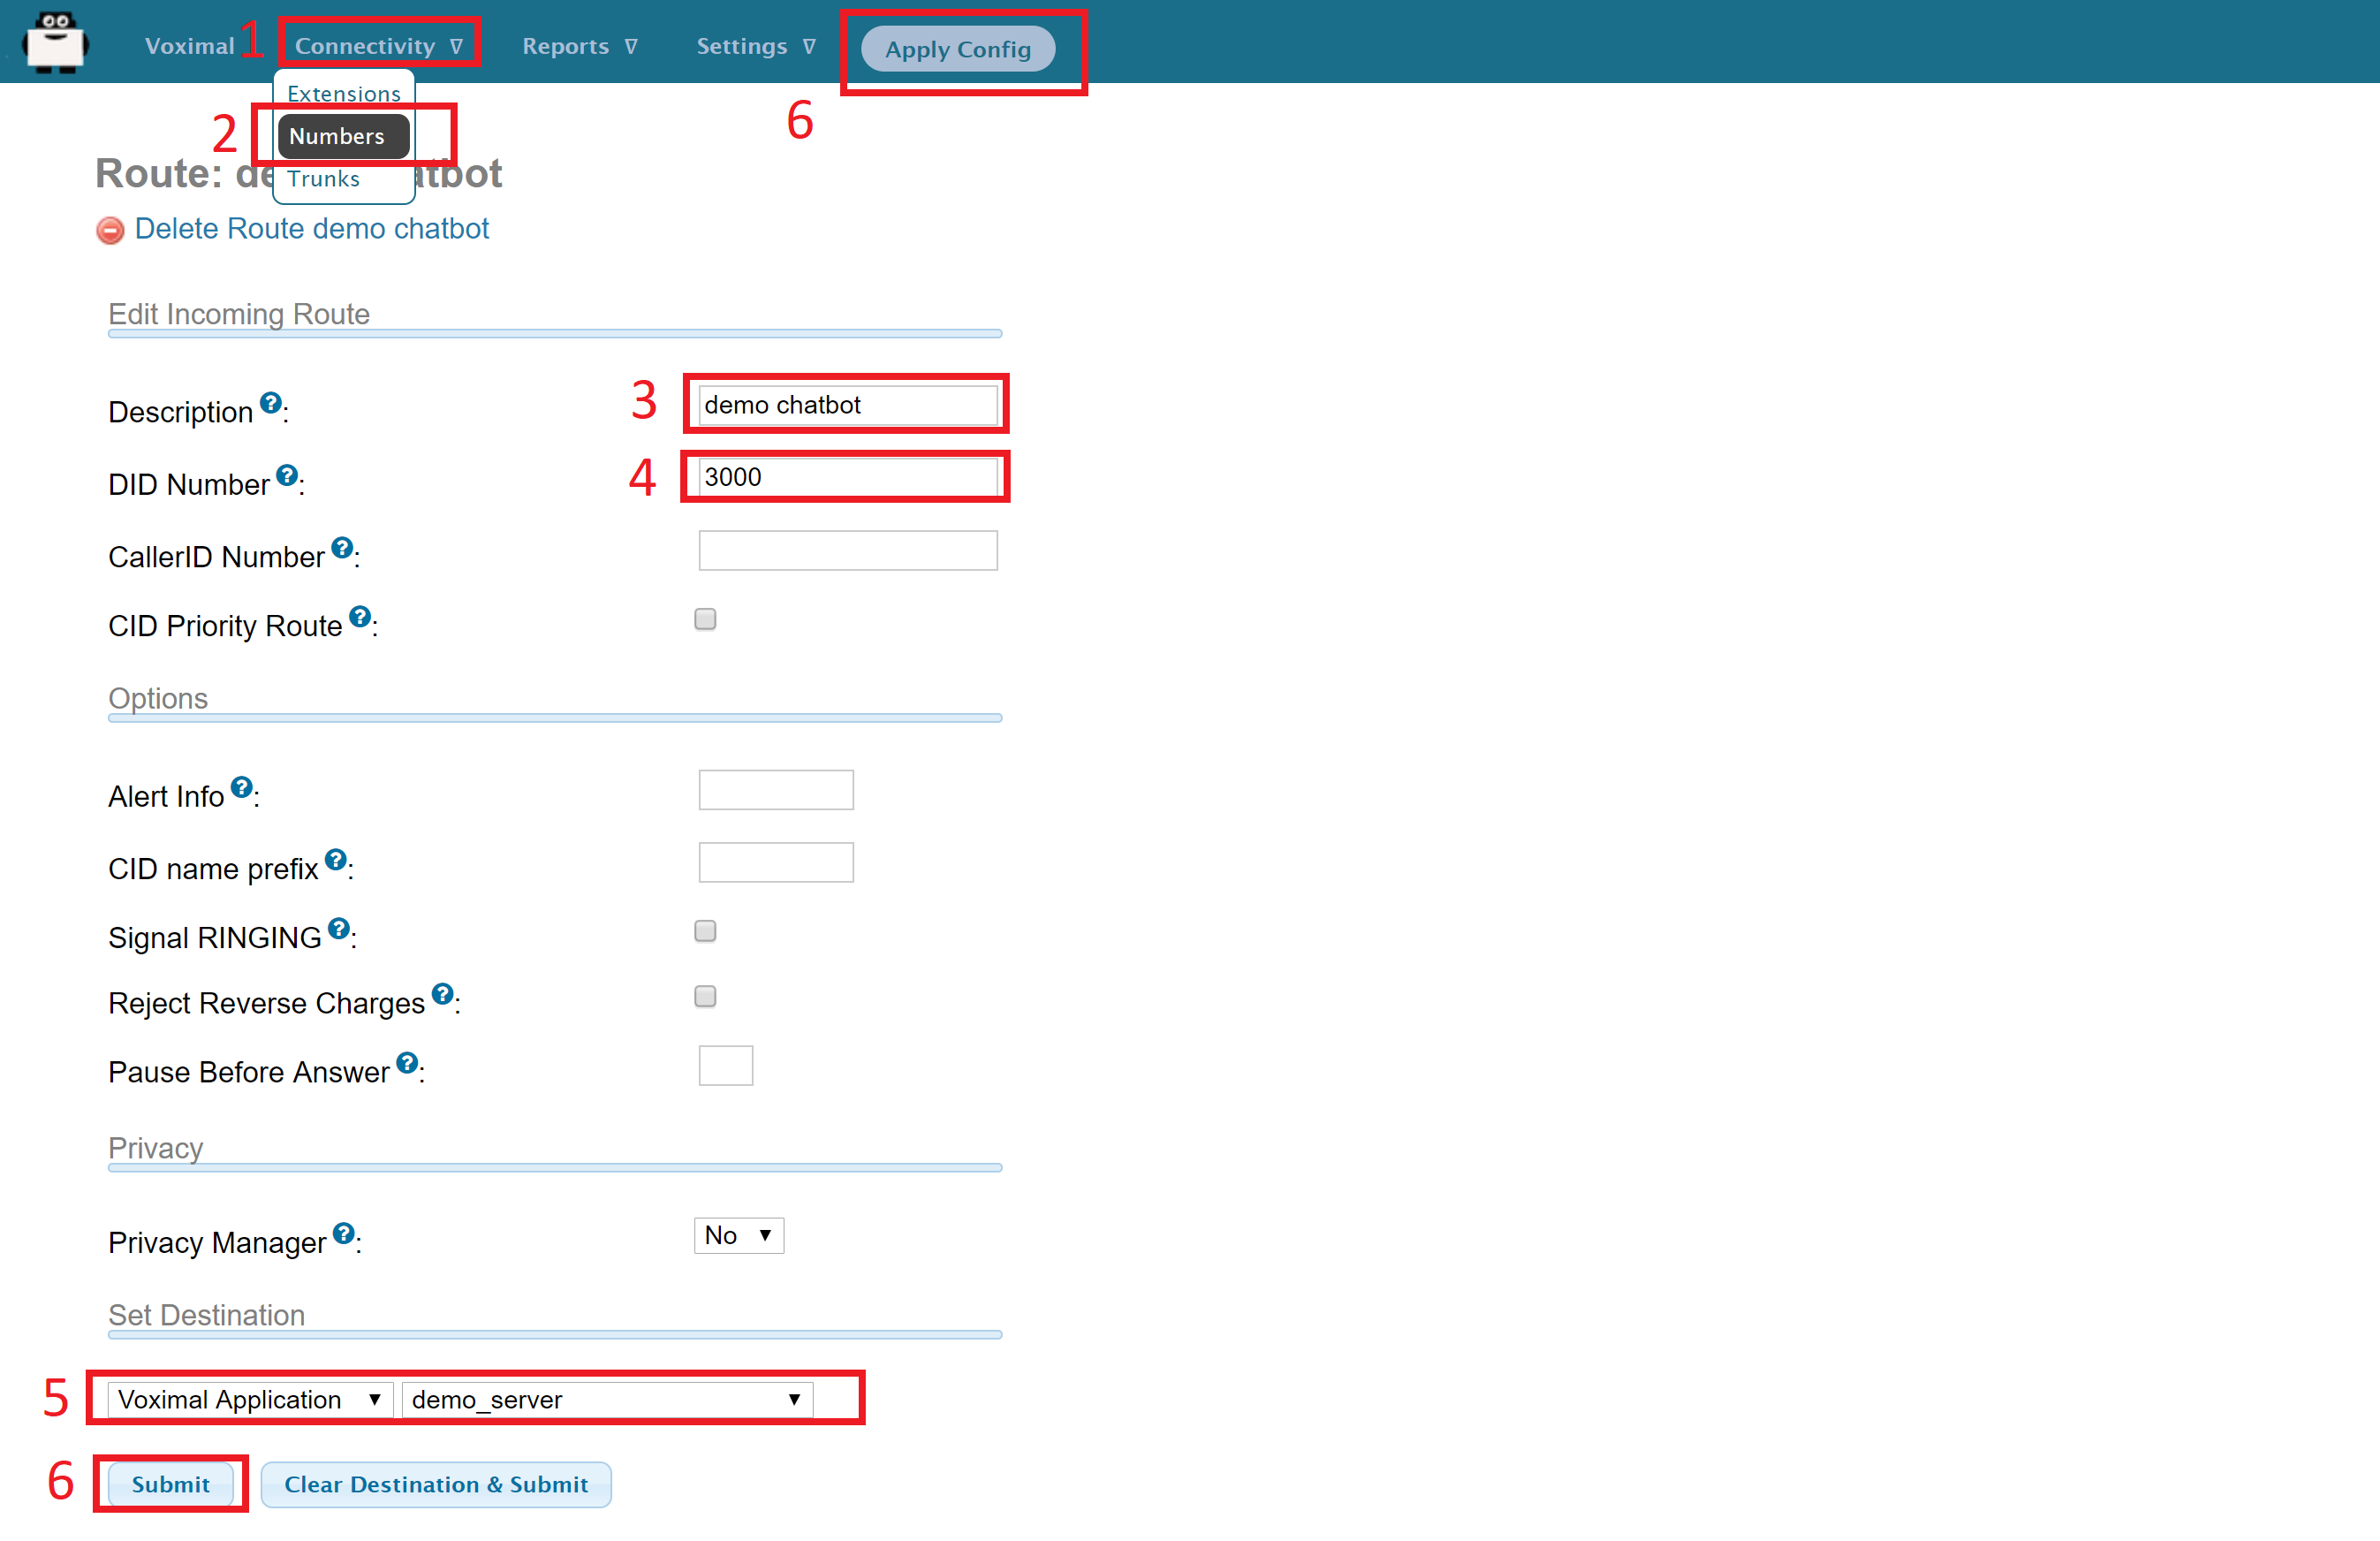
5. Set a call number to our account that just created, give it any number and name, the important part here is to set destination. it will be voximal application and link it to the account name that should appear on the list because we just made it **(demo_server)**
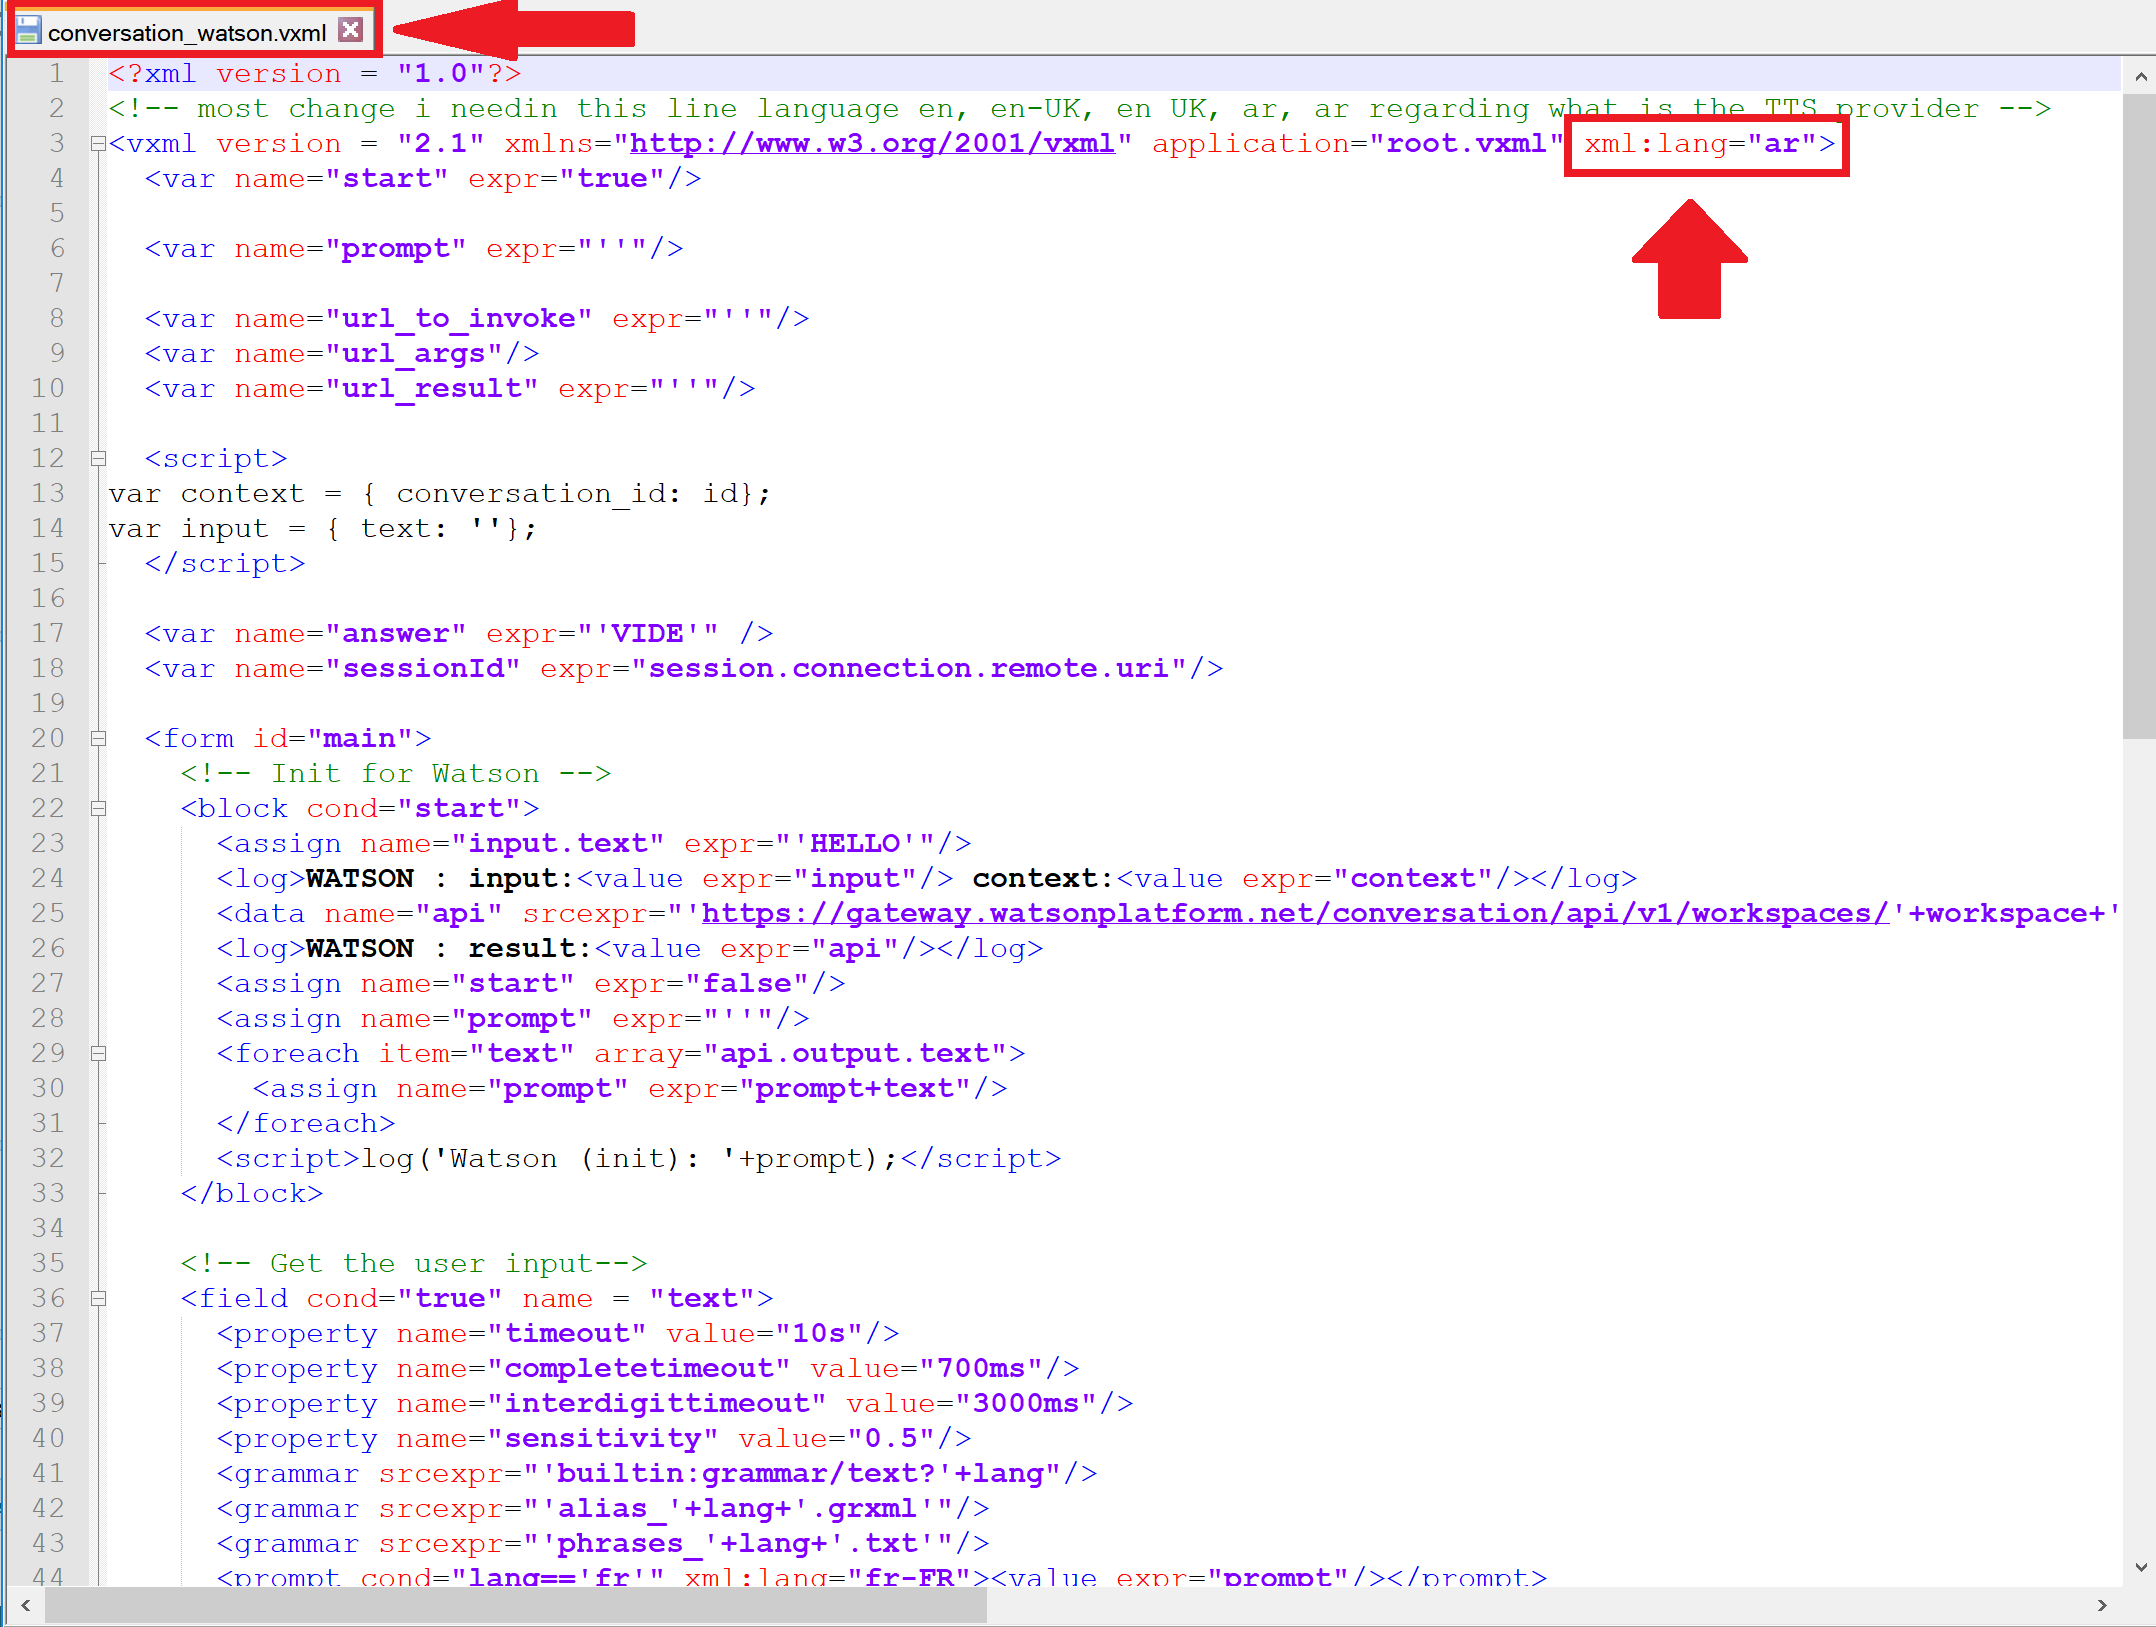
6. There are two files need to adapt to our case root.vxml and conversation_watson.vxml For the root file set the language that you want and supported by the provider (engine). also Because we use Watson so our credential will be Watson credential, we explain how to get these credential from Watson in the top of this page. in addition, By setting your email address you can have the results of your calls and your communication logs with the chatbot.
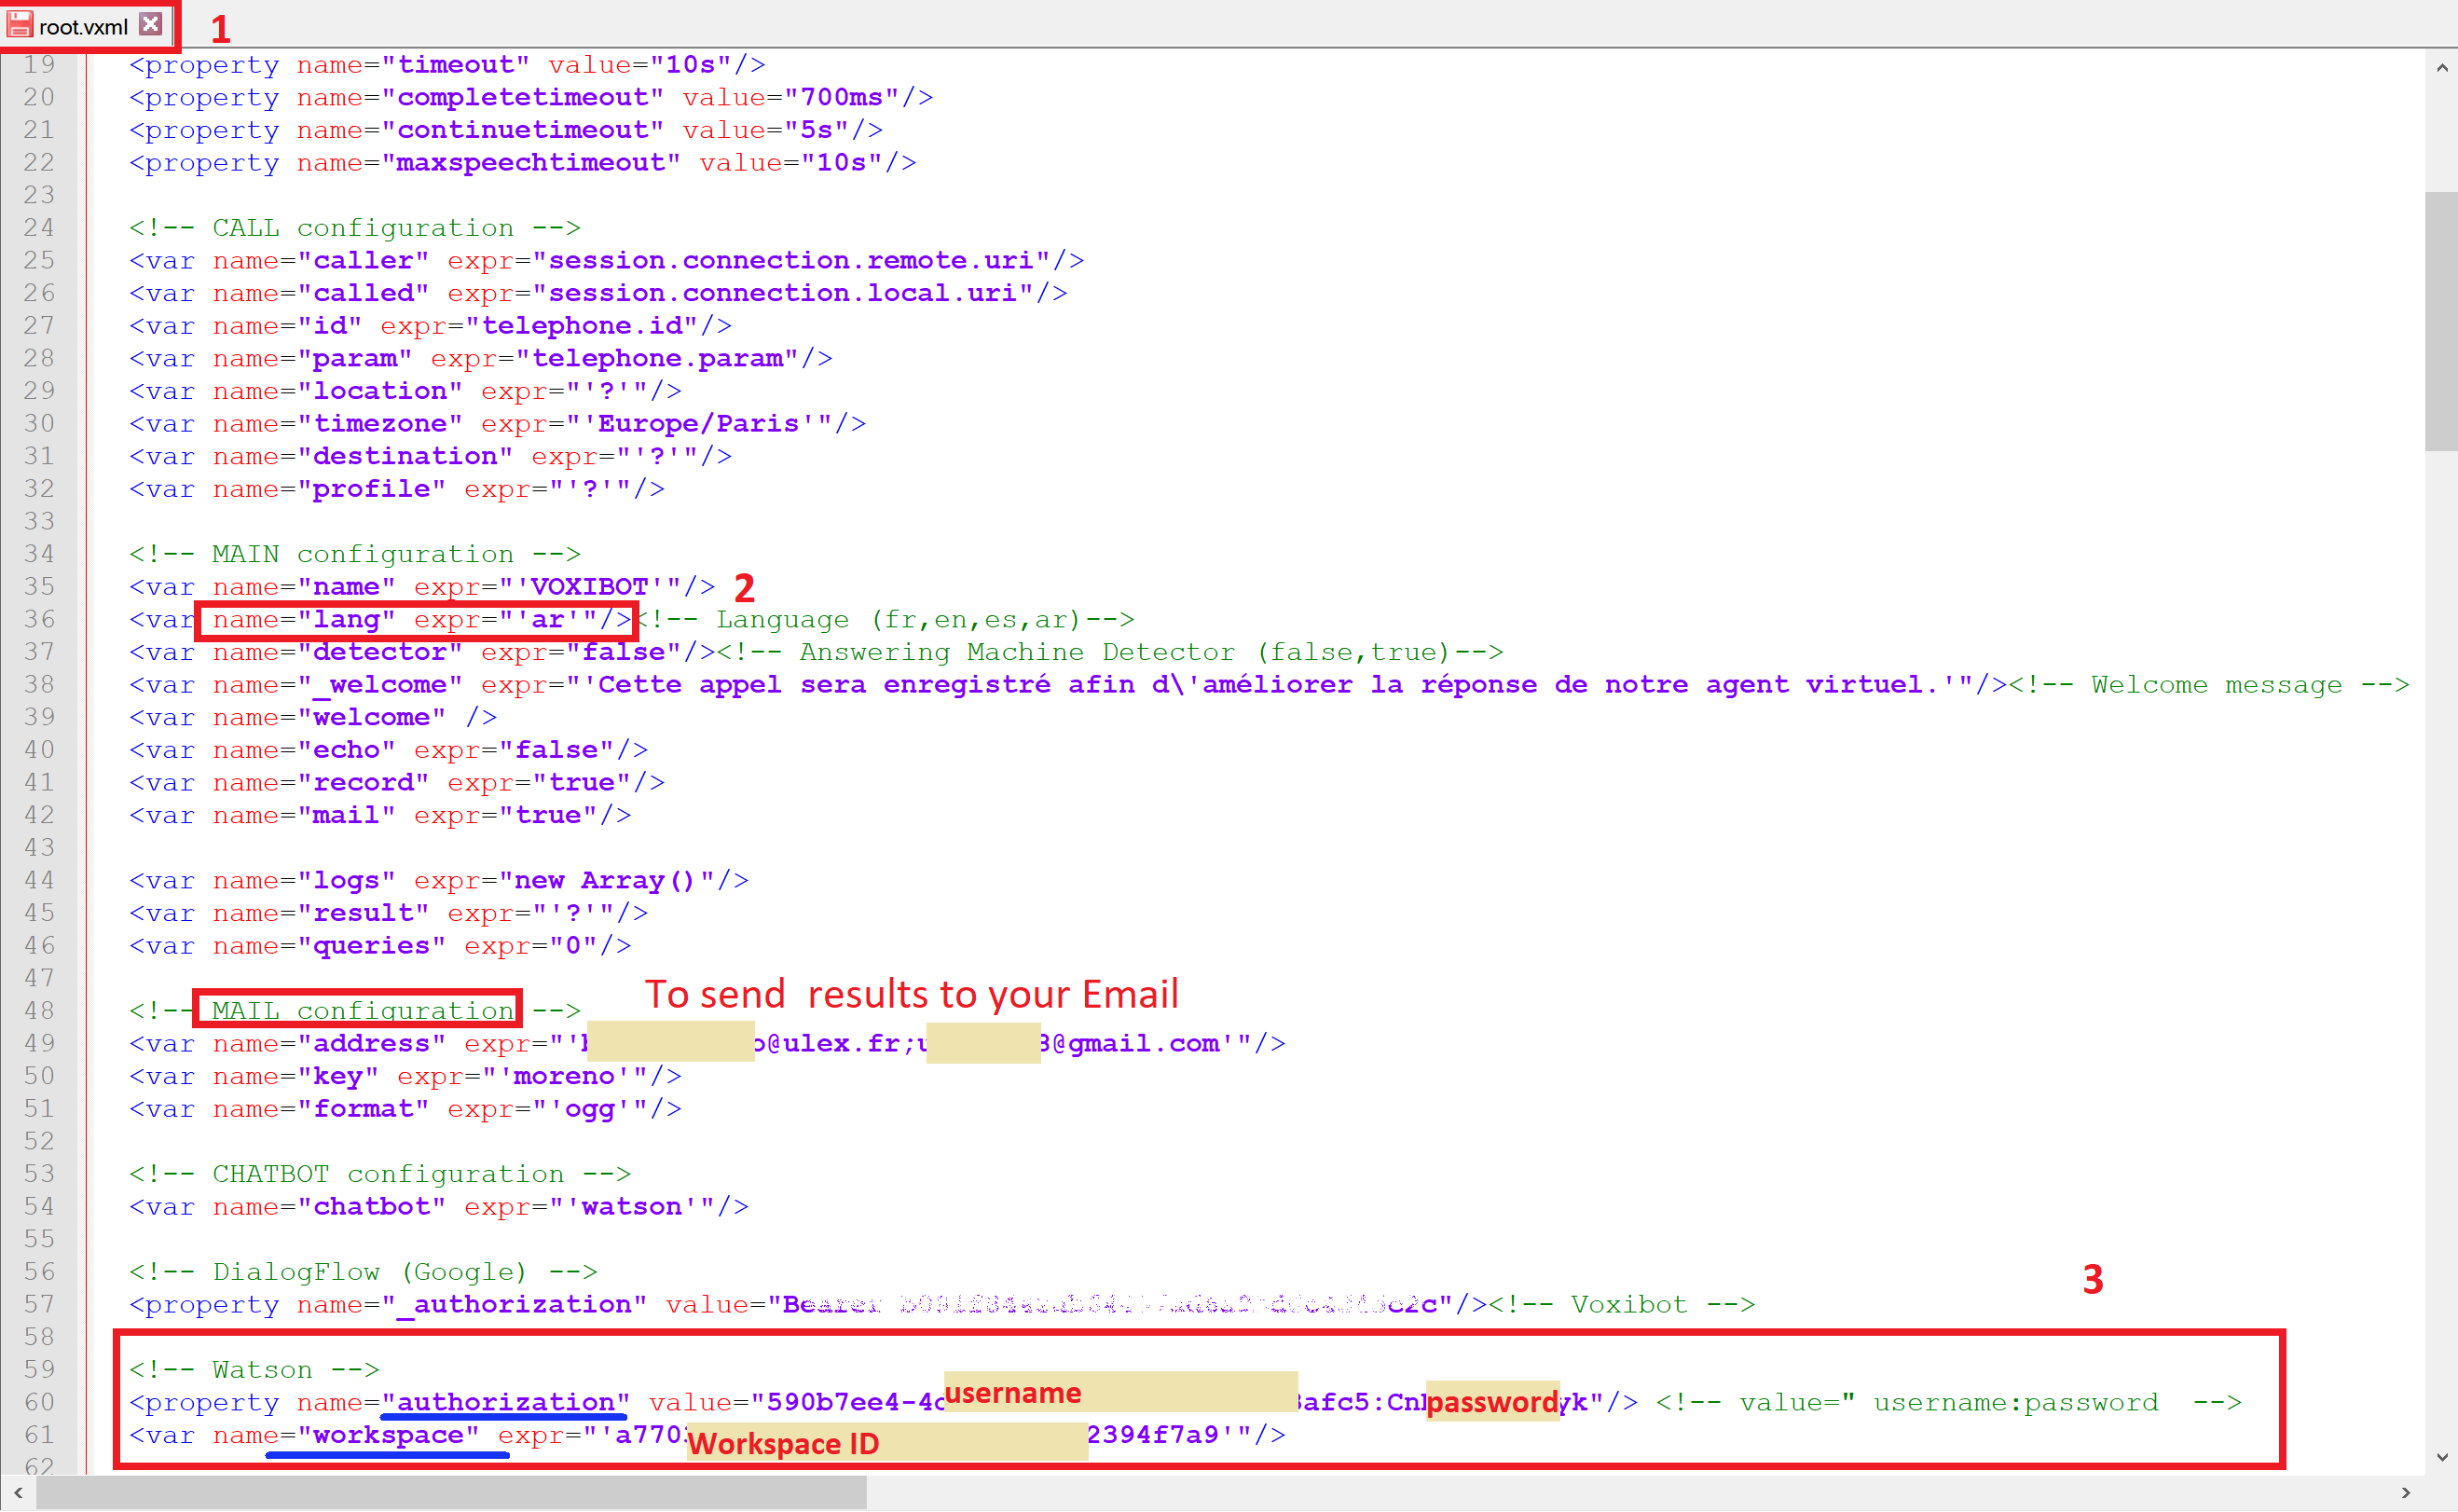
7. In conversation_watson put the language as you configure in root file. This depends on which workspace ID you want to communicate with.